The configuration of a dedicated piano practice space is a sophisticated exercise in environmental engineering, ergonomics, and cognitive science. To the casual observer, placing a piano in a living area may seem a matter of mere aesthetics; however, for the serious student or professional, the practice environment serves as the primary interface between the musician’s physical technique and the instrument’s mechanical response. Research into the psychology of learning indicates that a stabilized, optimized environment can facilitate a “flow state”, the alignment of challenge and skill that results in immersive productivity, while a poorly designed space can lead to chronic injury, auditory fatigue, and tuning instability.
In this guide, I will share the technical and environmental secrets I discovered so you can curate a professional-grade nook where your creativity can truly flourish, and recommended accessories and gear to set you up.
The Definitive Home Piano Practice Environment
A professional home piano practice space is a specialized environment designed to minimize cognitive load, optimize physical ergonomics, and control acoustic variables to foster a “flow state.” It requires a designated area with stable temperature and humidity, adjustable seating for proper kinetic alignment, task lighting to prevent visual fatigue, and organized access to pedagogical materials. By treating the space as a dedicated musical laboratory, you enhance the efficiency of your practice and the longevity of your instrument.
1. Environmental Psychology: Designing for Habit Formation
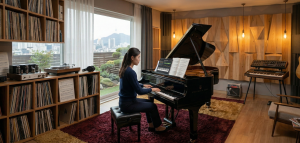
The psychology of space is a critical, yet often overlooked, component of music education. To the human brain, a dedicated practice corner signals the transition from “daily life” to “musical focus.” This phenomenon is scientifically recognized as Environmental Anchoring, a process where the subconscious mind associates specific physical stimuli with a particular cognitive state. By curating a specialized environment, you are essentially training your brain to enter a state of readiness the moment you sit at the bench.
The Science of Environmental Anchoring
Environmental anchoring is a form of classical conditioning. When a musician consistently practices in the same location, the neural pathways associated with piano playing become linked to the sensory inputs of that space (the smell of the wood, the specific angle of the light, the tactile feel of the bench).
- Neurological Priming: A dedicated space reduces the “activation energy” required to start. Instead of deciding to practice, the environment triggers the habit automatically.
- Context-Dependent Memory: Studies in cognitive psychology suggest that information is better recalled when the environment of retrieval matches the environment of encoding. Practicing in a consistent, professional-grade space reinforces the retention of complex musical structures and muscular memory.
The Architecture of the “Flow State”
To achieve a Flow State, a term coined by psychologist Mihaly Csikszentmihalyi to describe a period of intense, effortless concentration, your environment must be engineered to minimize Cognitive Load. Flow occurs when the challenge of the music matches the skill of the pianist, but this delicate balance is easily disrupted by “micro-distractions.”
Micro-distractions are subtle interruptions that force the brain to switch tasks, even for a millisecond. These include:
- Auditory Leaks: The low-frequency hum of a refrigerator or distant conversation.
- Visual Noise: A stack of unpaid bills or a flickering light bulb.
- Digital Intrusions: The blue light or notification vibration of a smartphone.
| Feature | Impact on Practice | Pedagogical Recommendation |
| Visual Sanctity | Reduces peripheral sensory overload. | Keep the 180-degree field of vision around the music stand clear of clutter. |
| Physical Boundaries | Creates a psychological “Safe Zone.” | Use room dividers or rugs to define the musical territory within a shared room. |
| Ergonomic Stability | Supports sustained neuro-muscular focus. | Ensure the bench and pedals are fixed to prevent micro-adjustments during play. |
Strategic Location: Reducing “Friction”
In the context of habit formation, Friction refers to any obstacle, physical or mental, that stands between the pianist and the instrument. A “low-friction” setup is the hallmark of a professional practice space.
1. The Accessibility Protocol
If a piano is buried under books, or if a digital piano requires a five-minute assembly of cables and stands, the likelihood of a spontaneous practice session drops by over 60%.
- The “Ready-to-Play” Rule: For digital setups, the instrument should be permanently connected to power. Use a dedicated cable management system to hide wires, ensuring the space looks inviting rather than chaotic.
- Climate & Comfort: Avoid “dead zones” like cold basements or humid garages. If the environment is physically uncomfortable, the brain will subconsciously associate the piano with discomfort, leading to practice avoidance.
2. Visual Sanctity and Cognitive Focus
During complex Sight-reading or the study of Harmonic Intervals, the brain’s prefrontal cortex is working at maximum capacity.
- Minimalist Aesthetics: Excessive decor, vibrant wall colors, or moving objects (like a fan or a TV) compete for neural resources. A minimalist “visual field” allows the eyes to focus entirely on the nuances of the score and the choreography of the hands.
- The Power of Symmetry: A symmetrical setup promotes a sense of balance and calm, which is essential when tackling high-tension repertoire like Rachmaninoff or technical études.
Psychological Safety and Acoustic Privacy
One of the greatest barriers to technical experimentation is the Fear of Being Overheard.
- The “Unheard” Zone: To master difficult passages, a pianist must be willing to play “ugly”, to repeat a single bar fifty times, to miss notes, and to experiment with different articulations. This requires Acoustic Privacy.
- Inhibiting Growth: If a learner feels that family members or neighbors are judging their “mistakes,” they will stick to pieces they already know, effectively stalling their progress.
- Solutions for Privacy: If soundproofing isn’t an option, use high-quality open-back headphones for digital pianos (to maintain a natural soundstage) or heavy acoustic curtains for acoustic instruments.
By treating the practice space as a private laboratory rather than a stage, the pianist gains the psychological freedom to fail, which is the only reliable path to mastery.
2. Acoustic Architecture: The Physics of Sound at Home
In the world of high-level pianism, we often say that the room is the second soundboard. Music is fundamentally “organized sound,” and the room in which you organize it acts as the “outer body” of the piano. If you place a $100,000 Steinway in a room with poor acoustics, it will sound like a budget keyboard; conversely, a modest upright can sound majestic in a well-treated space. Understanding the physics of your practice environment is essential for hearing the true timbre, overtones, and dynamic range of your playing.
Managing Frequencies and Standing Waves
To the untrained ear, sound just “fills a room.” To a pianist, sound is a series of pressure waves traveling at approximately 343 meters per second. When these waves hit a hard surface, they reflect. In a standard home environment, usually characterized by small dimensions and parallel walls, these reflections create two primary acoustic “enemies”: Flutter Echo and Standing Waves.
- Flutter Echo: This occurs when high-frequency sound waves bounce rapidly between two parallel hard surfaces (like two bare walls). It creates a “metallic” ringing or a zipping sound that follows every note you play, muddying your articulation.
- Standing Waves (Room Modes): These are lower-frequency waves that “get stuck” between walls because their wavelength is a perfect multiple of the room’s dimensions. This creates “hot spots” where certain bass notes sound thunderously loud and “dead spots” where other notes almost disappear.
Frequency Basics: The Mathematics of the Keyboard
Every note on your piano corresponds to a specific frequency measured in Hertz (Hz). Understanding the physical size of these waves helps you realize why your room might feel “crowded” by sound.
| Note Range | Frequency (Approx.) | Wavelength | Acoustic Behavior |
| Sub-Bass (A0) | 27.5 Hz | approx 12.5 meters | Omnidirectional; passes through walls; builds up in corners. |
| Middle C (C4) | 261.6 Hz | approx 1.3 meters | The “anchor” of piano music; starts to reflect off furniture. |
| High Treble (C8) | 4,186 Hz | approx 8 centimeters | Highly directional; easily absorbed by curtains or soft materials. |
Pedagogical Note: Because low-frequency waves (like those from the bottom octave of your piano) are longer than most rooms, they physically cannot “unfold” properly. This leads to acoustic masking, where the boomy bass prevents your ears from hearing the delicate upper harmonics of the right-hand melody.
Bass Traps: Solving the “Boomy” Corner Problem
Have you ever noticed that the piano sounds much “heavier” or “muddier” when you stand in the corner of the room? This is because corners act as acoustic megaphones for low frequencies.
- The Problem: Low-frequency pressure is highest at the boundaries of a room (walls and corners). This creates a “bass buildup” that obscures the clarity of your harmonic progressions.
- The Solution (Bass Traps): Unlike thin foam, a “Bass Trap” is a thick, porous absorber placed specifically in the corners. It works by converting the kinetic energy of the sound wave into trace amounts of heat.
- Home Hack: If you aren’t ready to buy professional acoustic panels, placing a large, fabric-covered sofa or a heavy bookshelf in a corner can act as a functional low-frequency absorber, tightening up the sound of your low-end scales.
Diffusion vs. Absorption: Finding the “Golden Mean”
The ultimate goal of acoustic architecture is not to make the room silent (which feels unnatural and “dead”), but to create a balanced decay. This is achieved through a strategic mix of Absorption and Diffusion.
1. Absorption (The “Muffler”)
Absorption is used to reduce the overall “reverberation time” (the time it takes for a sound to disappear).
- Where to use it: On hard, reflective surfaces directly behind the pianist or the piano’s lid.
- Materials: Heavy velvet curtains, thick wool rugs, or professional acoustic foam.
- Why it matters: Excessive reverb makes fast passages (like a Mozart Sonata) sound like a blurred mess. Absorption restores transient clarity, allowing you to hear the exact moment the hammer hits the string.
2. Diffusion (The “Scatterer”)
Diffusion is the secret weapon of professional studios. Rather than removing the sound energy, a diffuser breaks it up and scatters it in different directions.
- The “Bookshelf” Method: A bookshelf filled with books of varying depths and heights is a nearly perfect Quadratic Residue Diffuser. Because the books are uneven, they reflect sound waves at different times and angles.
- The Result: Diffusion prevents the sound from feeling “flat” or “boxed-in.” it preserves the “liveliness” of the piano while eliminating the harsh echoes. It makes a small practice room feel like a much larger, more prestigious recital hall.
The Piano-Room Synergy Checklist
To optimize your space today, perform this Acoustic Audit:
- The Clap Test: Stand at your piano bench and clap loudly. If you hear a “ring” or a “ping” after the clap, you have a flutter echo. Add absorption (a rug or curtain).
- Parallel Walls: Ensure your piano is not perfectly parallel to a bare wall. Angling an upright piano even by 5° can significantly reduce standing waves.
- The Floor Factor: If you have hardwood floors, place a thick rug specifically under the pedal lyre and the bench. This stops high-frequency reflections from bouncing off the floor and hitting the underside of the soundboard.
3. Ergonomics: The Kinesiology of the Piano Bench
The piano is one of the few instruments where the body remains in a fixed, seated position for extended periods, often performing thousands of micro-movements per minute. In this context, Ergonomics, the science of designing the environment to fit the human body—is not a luxury; it is a clinical prerequisite. Ignoring the kinesiology of the piano bench leads to Repetitive Strain Injury (RSI), carpal tunnel syndrome, and chronic back pain. To play with professional facility, you must treat your body as a mechanical extension of the instrument.
The “Alexander Technique” and Postural Alignment
Modern piano pedagogy heavily incorporates the Alexander Technique, an educational process that teaches the release of unnecessary muscular tension and the improvement of coordination. At the piano, this centers on maintaining a Neutral Spine.
- The Head-Neck Relationship: The “primary control” in the Alexander Technique is the relationship between the head and the spine. If you jut your chin forward to read sheet music, you compress the cervical vertebrae, which creates tension that travels down the arms to the fingertips.
- Polyphonic Fluidity: In complex polyphonic playing (where the hands must manage multiple independent voices), a rigid torso acts as a bottleneck. A neutral, flexible spine allows the weight of the upper body to shift subtly, supporting the “reach” of the arms across the full 88-key range without overstretching the delicate tendons of the wrist.
The Science of Adjustable Seating
Standard household furniture, such as dining chairs or office seats, is fundamentally unsuitable for piano practice. These seats are designed for leaning back, whereas piano playing is an active, forward-oriented activity.
The “Slope” and Elbow Alignment
An adjustable professional bench is essential to achieve the “Golden Alignment”:
- Height Calibration: Adjust the bench so that when your fingers are on the keys, your elbows are slightly higher than the keyboard surface.
- Gravity-Assisted Playing: This creates a natural downward slope from the elbow to the bridge of the hand. This allows gravity, rather than muscular force, to depress the keys.
- The 90-Degree Rule: While individual anatomy varies, your forearms should be roughly parallel to the floor, with the wrist remaining in a “neutral” position—neither collapsed (dropping below the keys) nor “broken” (arched too high).
| Feature | Impact on Performance | Consequence of Poor Setup |
| Bench Height | Optimizes “weight-dropping” from the shoulder. | Low seats cause “wrist pumping” and forearm fatigue. |
| Distance from Keys | Allows for full range of motion in the elbows. | Sitting too close “pins” the elbows to the ribs, stifling power. |
| Seat Firmness | Provides a stable base for the “Sit-Bones.” | Soft cushions absorb the body’s energy, reducing dynamic control. |
The Best Adjustable Roland Piano Bench on Amazon !
𝄞
As an Associate I earn from qualifying purchases.
Roland RPB-500 Piano Bench on Amazon !
𝄞
As an Associate I earn from qualifying purchases.
Understanding the Kinetic Chain
In kinesiology, the Kinetic Chain describes how different parts of the body act as a system of chain links to produce movement. In piano playing, the power does not originate in the fingers; it originates in the floor and the core.
1. Footing and Grounding
Unless you are using the pedals, your feet must be flat on the floor, slightly apart.
- The Anchor Effect: Your feet act as the “ground” for the entire system. If your feet are tucked under the bench or dangling, your core muscles must work overtime to keep you upright, which inevitably leads to shoulder tension.
- Pedal Pivot: When using the sustain pedal, the heel must remain firmly planted on the floor. This allows the ankle to act as a precise lever, rather than using the entire leg to “stomp” the pedal, which is clumsy and fatiguing.
2. The Sit-Bones and Weight Distribution
You should sit on the front half of the bench. * Pelvic Tilt: Sitting on your “ischial tuberosities” (sit-bones) with a slight forward tilt engages the core and frees the arms.
- The Weight-Dropping Technique: To produce a powerful fortissimo without tension, a pianist “drops” the weight of the entire arm into the keybed. This weight is supported by a stable torso and grounded feet. Without this kinetic connection, the pianist is forced to “squeeze” the keys, leading to a harsh, thin tone and potential injury.
Pedal Clearance and Footing Stability
For digital piano users, the “wandering pedal” is a significant ergonomic hazard. Because digital pedals are often lightweight plastic units, they tend to slide away from the player during use.
- The “Wandering Pedal” Hazard: If the pedal moves just two inches away from its optimal position, the pianist’s leg is forced into an over-extended, unnatural angle. Over a 60-minute session, this causes acute strain on the tibialis anterior (the muscle along the shin) and the hip flexors.
- The Solution (Non-slip Mats): Place a small, high-grip rubberized mat or “gaffer tape” under the pedal unit. For a professional aesthetic, a specialized “pedal rug” can be used to ensure the pedal remains at a consistent distance from the bench. This allows the foot to build muscle memory for the exact depth and timing of the sustain, which is vital for sophisticated “half-pedaling” techniques.
4. The Luminescence of Learning: Advanced Lighting Strategies
Lighting is more than just a way to see the notes; it affects your circadian rhythm and your cognitive stamina. Poor lighting leads to “eye strain,” which manifests as mental fatigue.
Task Lighting vs. Ambient Lighting
- Task Lighting: A dedicated piano lamp with a weighted base and an adjustable neck is indispensable. The light should be directed onto the music stand and the keys simultaneously, avoiding glare on the fallboard or screen.
- Spectrum Matters: Use “cool white” or “daylight” bulbs (5000K-6500K) for practice sessions. This spectrum mimics natural light, which is proven to improve alertness and concentration.
BenQ Piano LED Lamp on Amazon !
𝄞
As an Associate I earn from qualifying purchases.
Novolido Piano Lamp on Amazon
𝄞
As an Associate I earn from qualifying purchases.
Natural Light Management
While practicing by a window provides beautiful natural light, be wary of direct sunlight.
- Heat Damage: For acoustic pianos, direct sunlight can warp the soundboard and bleach the wood finish.
- Visual Glare: Use sheer curtains to diffuse harsh afternoon sun, which can make reading white sheet music painful.
5. Modern Integration: The Digital Hub
In the contemporary era of music education, the distinction between “traditional” and “tech-forward” practice has blurred. Whether you are performing on a handcrafted heirloom Steinway or a state-of-the-art Nord Stage, technology serves as a powerful pedagogical ally. Integrating a “Digital Hub” into your practice space is not about replacing the soul of the instrument; it is about utilizing high-fidelity tools to accelerate muscle memory, refine interpretative nuances, and streamline your library management.
The Digital Score Revolution: Tablets and Annotation
The transition from physical paper to digital displays is perhaps the most significant change in piano practice over the last century. The “Digital Hub” revolves around a central tablet—typically a large-format device like an iPad Pro 12.9″ or a Samsung Galaxy Tab S9 Ultra—which serves as a portal to your entire musical life.
- Software Ecosystems: Using professional notation apps like forScore (iOS) or MobileSheets (Android) allows for non-destructive annotation. You can layer different “versions” of markings—one for fingering, one for harmonic analysis, and one for your teacher’s feedback, without ever ruining a pristine score.
- Backlight and Contrast: Unlike paper, tablets provide consistent illumination. This eliminates the struggle with dim practice room lighting and allows you to adjust the “white point” of the screen to reduce visual fatigue during late-night sessions.
iPad Air 13-inch on Amazon !
𝄞
As an Associate I earn from qualifying purchases.
Ergonomics of the Digital Display: Preventing “Tech Neck”
While tablets offer convenience, they introduce new ergonomic risks. “Tech Neck” (cervical kyphosis) occurs when a pianist repeatedly leans forward or tilts their head down to read a screen placed too low.
1. The Eye-Level Mounting Protocol
To maintain the Neutral Spine discussed in our ergonomics section, the tablet must be positioned at a specific height and angle.
- The Sightline Rule: The top third of the tablet screen should be at eye level when sitting with correct posture. This prevents the collapse of the cervical vertebrae and keeps the airway open for relaxed breathing.
- Sturdy Stands: Avoid flimsy plastic holders. Use a heavy-duty, adjustable music stand or a dedicated tablet arm (like those from K&M or Hercules) that can support the weight of the device without vibrating when you play fortissimo.
Hercules Stands – Tablet and Phone Holder on Amazon !
𝄞
As an Associate I earn from qualifying purchases.
K&M 19790 Tablet Stand on Amazon !
𝄞
As an Associate I earn from qualifying purchases.
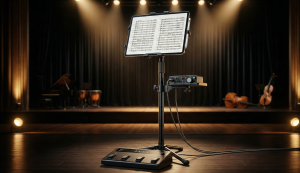
2. Bluetooth Page Turners: Preserving the “Flow State”
In a high-stakes performance or a deep practice session, taking your hand off the keys to turn a page creates a “cognitive break.”
- Mechanical Continuity: Bluetooth foot pedals (such as the AirTurn Duo or PageFlip) allow you to flip digital pages with a subtle tap of the left foot.
AirTurn Duo 500 Page Turner on Amazon !
𝄞
As an Associate I earn from qualifying purchases.
PageFlip Pedal Controller on Amazon !
𝄞
As an Associate I earn from qualifying purchases.
- Pedagogical Benefit: This maintains the Flow State and ensures that your hands never lose their placement during complex transitions. It effectively turns a 20-page sonata into one continuous, uninterrupted stream of music.
STOMP Bluetooth Page Turner for Ipad & Tablets on Amazon !
𝄞
As an Associate I earn from qualifying purchases.
The “Objective Listener”: Recording and Audio Analysis
One of the greatest challenges in piano mastery is that the act of playing is so cognitively demanding that we cannot truly “hear” ourselves while we are performing. Recording yourself is the single fastest way to bridge the gap between perceived performance and actual sound.
1. Acoustic Capture: The Physics of Microphone Placement
For an acoustic piano, capturing the “true” sound requires an understanding of Acoustic Shadows and Phasing.
- Condenser Microphones: Use large-diaphragm condenser microphones (like an AKG C414 or a more budget-friendly Rode NT1) to capture the wide frequency response of the piano.
Rode NT5 Microphone (Matched Pair) on Amazon !
𝄞
As an Associate I earn from qualifying purchases.
- The 3-5 Foot Rule: Placing the microphone too close to the strings results in “percussive thumping” and mechanical noise. Placing it 3 to 5 feet away allows the sound waves from the bass and treble to integrate, capturing the room’s resonance and a more natural timbre.
- Stereo Imaging: For advanced analysis, use a “Spaced Pair” (A-B) or “X-Y” configuration to hear how your melodies move across the stereo field, which helps in balancing the volume between the left and right hands.
2. Digital Capture: MIDI and DAW Integration
If you practice on a digital piano or a hybrid (like a Yamaha AvantGrand), you have access to the ultimate analytical tool: MIDI (Musical Instrument Digital Interface).
- The DAW Environment: Connect your piano via USB-MIDI to a Digital Audio Workstation (DAW) like Logic Pro, Ableton Live, or Steinway’s Spirio software.
- Velocity Visualization: In the DAW’s “Piano Roll,” you can see a visual representation of your Velocity—the exact numerical force (0-127) with which you hit every single key.
- Pedagogical Application: If a passage sounds “clumpy,” the DAW will show you that your 4th finger is hitting at a velocity of 85 while your 3rd finger is at 70. This objective data allows you to target your technical exercises with surgical precision.
- Quantization Analysis: While we don’t recommend “fixing” your timing with software, looking at a MIDI grid allows you to see if you are consistently rushing the upbeat or dragging in complex polyrhythms. It provides an unbiased “truth” that the human ear often misses.
The Hub as a Connectivity Center
Finally, your digital hub should facilitate Remote Learning. With a high-quality webcam and an audio interface, your home practice space becomes a global classroom. High-speed connectivity allows you to take masterclasses with teachers in London or New York from the comfort of your curated environment, ensuring your musical growth is never limited by geography.
6. Maintenance and Climate Control: Preserving the Instrument’s Integrity
An acoustic piano is far more than a piece of furniture; it is a complex, organic machine comprising over 12,000 parts, many of which are crafted from wood, wool felt, and high-tension steel. Because these materials are hygroscopic, meaning they naturally absorb and release moisture from the environment, the structural integrity and musicality of your piano are inextricably linked to the atmosphere of your practice space. To a professional, climate control is not just about maintenance; it is about protecting a significant financial and artistic investment.
Temperature and Humidity Stability: The Science of “Hygroscopy”
The primary reason pianos go out of tune or suffer mechanical failure is not frequent playing, but rather atmospheric fluctuation. When humidity rises, wood swells; when it drops, wood shrinks. In a piano, even a microscopic change in the dimensions of the soundboard can have a cascading effect on the instrument’s performance.
The Soundboard and the “Crown”
The soundboard is a large, thin diaphragm of spruce that is slightly arched, a shape known as the “crown.” The strings press down on this crown with thousands of pounds of pressure.
- High Humidity: The soundboard absorbs moisture, swells, and increases the arch of the crown. This pushes against the strings, increasing their tension and causing the piano to go sharp.
- Low Humidity: The wood dries out, the crown flattens, and string tension drops, causing the piano to go flat.
- Structural Risk: Repeated cycles of swelling and shrinking can lead to “cracks” in the soundboard or the bridge, which can be catastrophic for the instrument’s tone and prohibitively expensive to repair.
The “Golden Rule” of Humidity Management
To ensure the longevity of the action and the stability of the tuning, you must treat your practice space like a museum archive.
- Target Range: Aim for a constant Relative Humidity (RH) level between 40% and 50%.
- The Stability Factor: It is often better for a piano to be at a constant 55% than to fluctuate wildly between 30% and 60%. It is the change that causes the most damage to the wood fibers and the tuning pins.
- Impact on “Action”: The piano’s “action” (the internal mechanism) relies on wool felt and leather. High humidity makes these components swell, leading to “sluggish keys” or “sticking notes.” Conversely, extreme dryness makes them brittle, causing mechanical noise and “clicks.”
| Tool | Function | Pedagogical Insight |
| Hygrometer | Measures Relative Humidity (RH). | Place this near the piano, not the window, for the most accurate reading of the instrument’s immediate environment. |
| Humidifier / Dehumidifier | Regulates room-wide moisture. | Use an evaporative humidifier in winter and a compressor-based dehumidifier in summer to maintain the 45% “sweet spot.” |
| Damp-Chaser System | Internal climate control. | Also known as the “Piano Life Saver System,” this is installed inside the piano to create a micro-climate directly around the soundboard. |
Govee Bluetooth Hygrometer on Amazon !
𝄞
As an Associate I earn from qualifying purchases.
Eva-Dry Mini Dehumidifier or Equivalent on Amazon !
𝄞
As an Associate I earn from qualifying purchases.
Pro Breeze Large Dehumidifier on Amazon !
𝄞
As an Associate I earn from qualifying purchases.
Avoiding HVAC Hazards: Convection and Direct Airflow
The placement of your piano relative to your home’s Heating, Ventilation, and Air Conditioning (HVAC) system is a critical decision in the architecture of your practice space.
1. The Danger of Direct Airflow
Never place an acoustic or digital piano directly under or in front of an air conditioning vent or a heating duct.
- Thermal Shock: Forced air causes rapid, localized changes in temperature. If one side of the piano is being blasted by 72°F (22°C) air while the other is at 65°F (18°C), the wood will expand unevenly, leading to internal stress and tuning instability.
- Surface Condensation: Cold air hitting a warm piano (or vice versa) can cause condensation to form on the metal strings and tuning pins, leading to oxidation (rust), which ruins the string’s ability to vibrate clearly.
2. Radiators and Baseboard Heaters
Radiators are the “piano killers” of older homes. They emit intense, dry infrared heat that can drop the local humidity to below 15% in a matter of hours.
- Glue Failure: Extreme heat from a radiator can dry out the animal-hide glues used in traditional piano construction, causing the ribs to detach from the soundboard.
- Distance Protocol: A piano should be placed at least 3 to 5 feet (1 to 1.5 meters) away from any heat source. If space is limited, use a heat shield or high-quality insulation board between the radiator and the instrument.
Maintenance Schedule for the Serious Practitioner
To keep your space, and your instrument, performing at a professional level, follow this maintenance cycle:
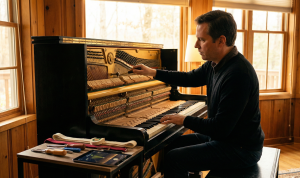
- Bi-Annual Tuning: Even if the piano sounds “fine,” it should be tuned at least twice a year to coincide with the change of seasons (Spring and Autumn) when the heating/cooling is switched.
- Regulation: Every 2–5 years, have a technician “regulate” the action to ensure the mechanical response of the keys remains uniform.
- Voicing: If the piano starts to sound “tinny” or overly bright, the hammers may need voicing (needling the felt) to restore a rich, mellow tone.
By mastering the climate of your practice room, you are not just maintaining a tool; you are ensuring that every time you sit down to play, the instrument responds with the same tonal color and mechanical precision as the day it was built.to expand and contract, leading to tuning instability and potential structural cracks.
7. The Professional Accessory Suite
To be a “PianoMode” practitioner, you must have the right tools within arm’s reach.
| Accessory | Purpose | Expert Recommendation |
| Metronome | Timing and Rhythm | Use a mechanical metronome for the tactile click or a high-precision app for complex meters. |
| Pencil & Eraser | Annotation | Always mark your scores. It establishes a “dialogue” with the music. |
| Microfiber Cloth | Hygiene | Keep the keys free of oils and dust to maintain a consistent tactile “grip.” |
| Practice Journal | Accountability | Log your BPM, challenging measures, and goals to track long-term growth. |
Digital Metronome Korg MA-2 Pocket on Amazon !
𝄞
As an Associate I earn from qualifying purchases.
Get the Classic Wittner Taktell Metronome on Amazon !
𝄞
As an Associate I earn from qualifying purchases.
Apple Pencil Pro on Amazon !
𝄞
As an Associate I earn from qualifying purchases.
Piano Practice Journal: 12 Month Log for Musicians on Amazon !
𝄞
As an Associate I earn from qualifying purchases.
8. Developing a Sustainable Practice Routine
The most beautifully designed space is useless without a rigorous routine. In the “Common Practice Period,” musicians treated practice as a discipline of both mind and body.
The 50/10 Rule
Practice for 50 minutes of focused “deep work,” then take a 10-minute break to reset your ears and stretch your hands. This prevents cognitive saturation and physical fatigue.
Goal-Oriented Sessions
Never sit down “just to play.” Every session should have a specific objective:
Repertoire/Sight-reading: 20 minutes of building new connections or polishing a piece.
Warm-up: 10 minutes of scales or Hanon exercises to sync the “kinetic chain.”
Technical Work: 20 minutes on a specific “knot” or difficult passage.
Conclusion
Setting up your piano practice space at home is an act of professional self-respect. It is the realization that your environment directly dictates the quality of your output. By mastering the “Acoustic Architecture” of your room, prioritizing the “Kinesiology” of your posture, and integrating “Modern Learning Aids,” you create a sanctuary where the complex language of music can be decoded and mastered.
Remember, the goal is to remove every possible barrier between your intent and your execution. Start with one change today, perhaps adjusting your lighting or clearing the clutter, and observe how your relationship with the instrument evolves. Your journey toward musical mastery begins with the very space in which you sit.
Where is the worst place to put a piano at home?
The worst location is a high-traffic hallway or a room with extreme temperature fluctuations, such as a sunroom or a kitchen. These areas introduce noise distractions and environmental stress that can damage the instrument and hinder focus.
Do I really need an adjustable bench?
Yes. Every person has a different torso-to-arm length ratio. A fixed bench forces many players to sit too low, leading to hunched shoulders and wrist strain. An adjustable bench is the most important ergonomic investment you can make.
How do I stop my digital piano from wobbling?
Avoid “X-style” stands if possible, as they often lack stability. Invest in a “Z-style” or a four-legged table stand. For the ultimate stability, use the furniture-style stand specifically designed by the manufacturer for your model.
Can I practice with headphones all the time?
While headphones are excellent for focus and avoiding noise complaints, try to practice “open-air” at least 20% of the time. Headphones alter your perception of “natural decay” and “sympathetic resonance,” which are vital for developing a professional touch.
Last updated April 3, 2026