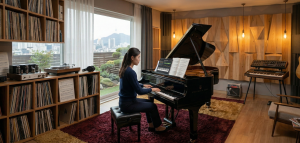
Capturing your piano performances at home can feel both exciting and intimidating at first. Whether your goal is to document your progress, create content for sharing online, or simply enjoy listening back to your playing, knowing how to set up an effective recording environment is crucial. I’ve gone through many trial-and-error experiences to figure out how to record your piano playing at home in a way that produces clear, balanced, and engaging sound, without needing a professional studio.
In this guide, you will learn how to choose the right gear, optimize your room’s acoustics, and use professional techniques to capture the true tone color and resonance of your instrument.
Recording your piano at home is the best way to objectively analyze your progress, share your music with the world, and explore the physics of harmonics that make the piano such a rich instrument. To get a professional sound, you must master the balance between your instrument’s mechanical source and the digital environment.
How to Record High-Quality Piano at Home
To record a piano at home in 2026 with professional clarity, you must first identify your sound source. For acoustic pianos, use a pair of large-diaphragm condenser microphones in an “XY” configuration connected to an audio interface. For digital pianos, connect via a USB-MIDI cable to a Digital Audio Workstation (DAW) to capture clean, noise-free data. In both cases, room treatment, using soft materials to reduce echoes, is the single most important factor in achieving a “studio” sound.
1. The Importance of Recording Your Piano at Home
Recording your piano sessions is more than just pressing a button. For me, it became an essential part of improving my skills. Listening to yourself objectively often reveals nuances in timing, dynamics, and phrasing that you might miss while playing. Beyond self-assessment, recordings are also a great way to share your music with friends, family, or your music community. Sometimes, it’s fun to see how your interpretation of a piece evolves over time when you revisit old recordings.
Moreover, recording opens up creative avenues. Once I started layering tracks and experimenting with effects, it changed how I approached playing and composing. You don’t need a big budget to get started, just a few basics to help you catch your best sound.
2. Understanding Your Instrument’s Sound Source
Before buying gear, you must understand how your piano produces sound. This determines your entire recording signal chain.
Acoustic Pianos: Capturing Mechanical Energy
An acoustic piano is a mechanical marvel. When you press a key, a hammer strikes a string, which vibrates the soundboard. To record this, you aren’t just recording strings; you are recording the tone color (timbre) of the wood and the physical space.
- Challenge: You have to deal with background noise and room reflections.
- Goal: To capture the natural harmonics and the “bloom” of the notes.
Digital Pianos and MIDI: The Power of Data
Digital instruments simulate sound electronically. You have two main options here:
- Audio Recording: Taking the “Line Out” signal directly into an interface. This gives you the exact sound of your piano’s internal samples.
- MIDI Recording: Capturing the “performance data” (which key was hit, how hard, and for how long). This allows you to use “Virtual Instruments” (VSTs) later, giving you the sound of a $100,000 Steinway on your laptop.
3. Tutorial: Recording an Acoustic Piano
This is the most complex but rewarding method for achieving an organic, “breathing” sound.
Required Gear
- Two condenser microphones (small or large diaphragm).
- An audio interface with at least two XLR inputs (e.g., Focusrite Scarlett 2i2).
- Two XLR cables and boom microphone stands.
Step-by-Step Guide
- Room Preparation: Minimize echo by placing rugs or heavy curtains near the piano. Ensure the instrument is freshly tuned.
- Mic Placement (XY Technique): Open the piano lid. Place the two mics inside, about 8–12 inches above the strings. Cross the capsules at a 90-degree angle. This prevents phase cancellation and creates a wide, immersive stereo image.
- Setting Gain Levels: Play the loudest section of your piece. Adjust the gain on your interface so the signal peaks around -6dB. Never let the meter hit the red (clipping), as digital distortion will ruin the take.
4. Guide: Recording a Digital Piano (Direct Audio)
This is ideal for those who love the factory sounds of their Yamaha, Kawai, or Roland instruments.
Required Gear
- Two 1/4″ TRS (Jack) cables.
- An audio interface.
- A DAW (Digital Audio Workstation) like Ableton, Logic Pro, or Audacity.
The Method
- Connect the L/MONO and R outputs of your piano to Inputs 1 and 2 of your interface.
- In your DAW, create a stereo track.
- The Advantage: Total silence from the outside world. You can record a masterpiece in the middle of the night without a single microphone picking up a barking dog or a passing car.
5. Essential Gear for Your Home Studio
You don’t need a million-dollar studio, but “budget-friendly” doesn’t mean “low-quality.” Here is the professional-grade gear I recommend:
Roland FP-10 & FP-30X: The USB-Audio Powerhouse
The Roland FP-30X is unique because it features a built-in USB Audio Interface. This means it can send both MIDI and high-quality digital audio through a single cable.
- The Setup: Connect a USB Type-B to USB-A (or USB-C) cable from the “Computer” port on the back of the Roland to your PC/Mac.
- Recording Audio: 1. Install the Roland Piano driver on your computer. 2. In your DAW (Logic, Ableton, or Audacity), select “Roland Digital Piano” as your Input Device. 3. Create an Audio Track and hit Record. The sound from the Roland speakers is now captured digitally without any loss of quality.
- Recording MIDI: Simply create a MIDI track; the Roland will show up as a MIDI device automatically.
Roland FP-10 Digital Piano on Amazon !
𝄞
As an Associate I earn from qualifying purchases.
Roland FP-30X on Amazon !
𝄞
As an Associate I earn from qualifying purchases.
Arturia KeyLab Essential mk3: The DAW Commander
As a dedicated controller, the KeyLab is designed to be the “brain” of your software studio. It excels at controlling Virtual Instruments (VSTs).
- The Setup: Connect via the included USB-C cable.
- The Tutorial:
- Open your DAW and load Arturia’s Analog Lab V (included with the keyboard).
- Set the KeyLab to “DAW Mode” using the onboard screen.
- Use the faders to control the piano’s “brightness” or “reverb” in real-time while you record.
- Since it’s MIDI, your recording will appear as blocks in the “Piano Roll,” allowing you to fix mistakes or change the piano sound later.
Arturia KeyLab Essential mk3 — 61 Key on Amazon !
𝄞
As an Associate I earn from qualifying purchases.
Casio PX-870 Privia: The “No-Computer” Solution
The Casio PX-870 is a premium console piano. While it can connect to a computer via MIDI, its standout feature is the ability to record high-quality audio directly to a flash drive.
- The Setup: Insert a standard USB Flash Drive into the “USB to Device” port.
- The Tutorial:
- Press and hold the Function button and the Audio Recorder key.
- When the light flashes, start playing. The piano records the internal sound directly to the drive as a .WAV file (44.1 kHz, 16-bit).
- Once finished, stop the recording and take the flash drive to your computer to share the file or upload it to SoundCloud.
Casio PX-870 Privia Digital Piano on Amazon !
𝄞
As an Associate I earn from qualifying purchases.
Studiologic SL88 Studio: The Professional Choice
This is a “pure” controller with a weighted Fatar keybed, aimed at users who want the most realistic touch possible for high-end VSTs like Keyscape or Pianoteq.
- The Setup: Use the USB port for power and MIDI, or the 5-pin MIDI ports for connecting to external hardware synths.
- The Tutorial:
- Download the SL Editor software. This is crucial for adjusting the Velocity Curves (how the software responds to your touch).
- In your DAW, load a high-end Piano VST.
- Because the SL88 has three “X/Y joysticks,” you can map Joystick 1 to “Damper Resonance” to add realistic depth to your recording as you play.
Studiologic SL88 MIDI Keyboard Controller on Amazon !
𝄞
As an Associate I earn from qualifying purchases.
The Audio Interface
The interface converts the analog signal from your mics into digital bits your computer can understand.
For many home setups, the Focusrite Scarlett Solo 4th Gen has become the industry standard due to its redesigned preamps and ultra-low-noise performance. However, choosing this specific model comes with technical trade-offs that every pianist should understand:
The Advantages (Pros):
- RedNet-Grade Converters: With a 120dB dynamic range, this interface uses the same technology found in high-end professional studios, allowing you to capture the subtle nuances of a pianissimo passage without unwanted hiss.
- Enhanced Air Mode: This feature adds a high-end sheen and rich harmonics to your sound, simulating the effect of a classic Focusrite studio console. It makes acoustic pianos sound more “expensive” and present in the mix.
- Loopback Functionality: This is a game-changer for piano teachers or content creators. It allows you to route computer audio into your DAW or streaming software, making it easy to record yourself playing along to backing tracks or lessons.
- High Gain Range: With 69dB of gain, it can easily power demanding microphones without needing an external booster.
The Limitations (Cons):
- Single XLR Input: The Solo only has one microphone input. This means you cannot record an acoustic piano in stereo (which usually requires two mics for a wide, immersive sound). You are limited to a “mono” recording unless you are recording a digital piano via the line inputs.
- No Physical MIDI Ports: It relies entirely on USB. If you have an older digital piano that only uses 5-pin MIDI DIN cables, you will need a separate converter to connect to your computer.
- Input Sharing: While it has two inputs, only one is an XLR. If you plan on recording yourself singing and playing an acoustic piano with two mics simultaneously, you would need to upgrade to the Scarlett 2i2.
Focusrite Scarlett Solo 4th Gen Audio-interface on Amazon !
𝄞
As an Associate I earn from qualifying purchases.
Focusrite Scarlett 2i2 Audio Interface on Amazon !
𝄞
As an Associate I earn from qualifying purchases.
Connecting Older Instruments: Roland UM-ONE mk2
If you are using an older digital piano that lacks a USB-B port, I highly recommend the Roland UM-ONE mk2 USB MIDI Interface. This high-performance “One-In, One-Out” cable provides low-latency MIDI processing and high-speed FPT throughput, ensuring your performance data is captured with perfect timing and zero lag.
Roland One in Two Out Midi Cable on Amazon !𝄞As an Associate I earn from qualifying purchases.
Microphones (For Acoustic Only)
For a piano’s wide frequency range, condenser microphones are essential.
- Matched Pair: Using two microphones allows for Stereo Imaging, making the bass sound like it’s coming from the left and the treble from the right.
- Rode NT5 (Small Diaphragm) for precision, or AKG P170 for an affordable entry into high-fidelity recording.
Rode NT5 Microphone (Matched Pair) on Amazon !
𝄞
As an Associate I earn from qualifying purchases.
Monitoring
You cannot mix or monitor what you cannot hear accurately. In a home recording environment, choosing “Closed-Back” headphones is non-negotiable to prevent click track or playback bleed from leaking into your microphones.
Sennheiser HD280 Pro The Sennheiser HD280 Pro is a legendary choice for isolation. These headphones are specifically designed to block out external noise and prevent any sound from escaping the ear cups.
- Pros: Incredible passive noise isolation (up to 32dB), very accurate frequency response, and highly durable.
- Cons: The clamping force is quite tight, which can be fatiguing during long practice sessions, and the soundstage is relatively narrow.
Sennheiser HD 280 Pro Headphone
𝄞
As an Associate I earn from qualifying purchases.
I personally use the same Beyerdynamic DT 770 Pro (80 Ohm) for over 8 years now, and they remain my top recommendation for comfort and sonic detail.
- Pros: Exceptional comfort thanks to the velour ear pads, making them perfect for hours of playing. The “Bass Reflex” technology provides a rich, deep low-end that makes the piano’s bass register feel powerful and authentic.
- Cons: While they are closed-back, they offer slightly less isolation than the Sennheisers. Also, the non-detachable cable can be a point of failure after several years of heavy use.
Beyerdynamic DT 770 Pro on Amazon
𝄞
As an Associate I earn from qualifying purchases.
The Verdict for Pianists: If your primary goal is absolute silence and preventing mic bleed in a loud room, the Sennheiser HD280 Pro is your tool. However, if you value long-term comfort and a more “musical” and spacious sound while you play, the Beyerdynamic DT 770 Pro is a superior investment for your musical journey.
3. Optimizing Your Recording Environment
The room is the most overlooked “instrument” in your setup. Even the best microphone will sound terrible in a room with “flutter echo” (the zingy sound you hear when you clap in an empty room).
Acoustic Treatment on a Budget
You don’t need professional foam. To improve your tone color, use what you have:
- Area Rugs: Place a thick rug under an upright or grand piano to dampen floor reflections. Hardwood or tile floors reflect sound instantly, creating a harsh, “clattery” top end. A rug absorbs these early reflections, grounding your sound.
- Bookshelves: Filled bookshelves act as natural “diffusers.” Because the books are of different sizes and depths, they break up sound waves and scatter them in multiple directions, preventing the “slap-back” echo that occurs with flat surfaces.
- Heavy Curtains: Cover windows to prevent glass reflections. Glass is a highly reflective material that can make your piano’s higher registers sound “brittle” or piercing in a recording.
- Soft Furnishings: A plush fabric sofa or even a pile of cushions placed in the corners of the room can act as makeshift “bass traps.” These absorb the low-frequency energy that often builds up in corners, preventing your recording from sounding “muddy” or boomy.
- Wall Hangings: If you have large sections of bare wall, hanging a thick tapestry or even a heavy moving blanket can eliminate “flutter echo”—that metallic ringing sound you hear when you clap your hands in an empty room.
Noise Floor Management
Recording is the art of “Signal-to-Noise Ratio.” You want a high signal (the pure sound of the piano) and a low noise floor (the ambient sound of the environment).
- Environmental Timing: The most effective noise management tool is often the clock. Recording late at night or during “quiet hours” in your neighborhood reduces the risk of traffic noise, sirens, or birds interfering with your perfect take.
- Mechanical Silence: Turn off refrigerators, AC units, and fans before hitting the red button. Even the low hum of a laptop fan can be picked up by sensitive condenser microphones. If possible, place your computer as far from the microphones as your cables allow.
- Electronic Hygiene: Keep your audio cables away from power bricks and electrical outlets. Crossing an XLR cable over a power cord at a 90-degree angle (rather than running them parallel) can prevent electromagnetic interference or “60-cycle hum” from entering your signal.
- Pedal and Bench Noise: Lubricate a squeaky sustain pedal and ensure your piano bench is stable. In a high-fidelity recording, the “creak” of a wooden bench can be as loud as a pianissimo chord.
4. Professional Microphone Placement Techniques
If you are recording an acoustic piano, where you put the mic is often more important than the microphone itself. Proper placement acts as a natural “equalizer,” shaping the tone color before the sound even reaches your software.
The XY Technique (Phase-Coherent)
Place two microphones at a 90-degree angle to each other, with the capsules (the heads) almost touching. Position them about 8–12 inches above the hammers with the lid fully open.
- Sound Character: This setup provides a focused, intimate sound with a natural center. It captures the attack of the hammers clearly, which is ideal for pop, jazz, or rhythmic classical pieces.
- Benefit: Because the capsules are so close together, the sound reaches both mics at the same time. This prevents Phase Cancellation, ensuring your recording sounds full and remains “mono-compatible” (it won’t disappear if played on a single smartphone speaker).
The Spaced Pair (A/B)
Place one microphone over the bass strings and another over the treble strings, usually about 18 to 24 inches apart.
- Sound Character: This creates a very wide, cinematic stereo image. You will hear the low notes leaning toward the left speaker and high notes toward the right, mimicking the pianist’s perspective.
- The 3-to-1 Rule: To avoid a thin or “hollow” sound, the distance between the two microphones should be at least three times the distance from each microphone to the piano strings. If your mics are 6 inches from the strings, they should be at least 18 inches apart from each other.
The Blumlein Pair (For Grand Pianos)
For those seeking a highly realistic, “live” feel, the Blumlein technique uses two ribbon or condenser microphones with a figure-8 polar pattern placed at a 90-degree angle.
- Benefit: This captures the direct sound of the strings while simultaneously picking up the natural harmonics and reflections from the room behind the mics. It results in an incredibly deep and “three-dimensional” recording.
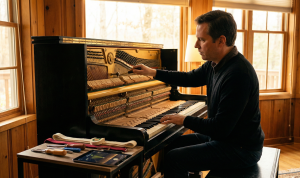
Special Consideration: Upright Pianos
Most home players own an upright piano. To get a professional sound here:
- Open the Top: Placing mics just inside the top lid captures a bright, clear tone.
- Remove the Bottom Panel: For a unique, “lo-fi” or woody sound, remove the panel near the pedals and place a microphone near the soundboard. This captures the rich vibrations of the lower strings and the mechanical “thump” of the pedals, which adds character to modern ambient or indie music.
Experiment and Listen
Every piano and every room is unique. Move your microphones just two inches at a time—closer for more “mechanical detail” (hammers and dampers) or further away to capture the bloom and resonance of the soundboard. Use your Beyerdynamic DT 770 Pro headphones to monitor the changes in real-time; the difference between a “good” take and a “masterpiece” is often found in the final few inches of mic positioning.
Beyerdynamic DT 770 Pro on Amazon
𝄞
As an Associate I earn from qualifying purchases.
Conclusion: Your Journey to Perfect Sound
Recording your piano is a bridge between the physical art of performance and the technical world of production. By understanding the harmonics of your instrument and treating your room with care, you transform a simple practice session into a professional-grade production.
Start small: focus on your room acoustics first, then invest in a solid interface like the Focusrite Scarlett. As you listen back to your takes, you will discover nuances in your playing that no teacher could ever point out. It is the ultimate tool for self-mastery.
Ready to elevate your sound? Invest in a matched pair of condenser microphones today and hear your piano the way it was meant to be heard.
Can I record my piano with just a phone?
Yes, but the internal “limiter” on most phones will squash the dynamics. If you must use a phone, use an external clip-on microphone like the Shure MV88 to improve clarity.
What is the best free software for recording?
Audacity is great for simple audio capture. If you want to get into MIDI and professional mixing, Cakewalk (Windows) or GarageBand (Mac) are the best free entry points.
How do I stop my recording from sounding “distorted”?
This is usually caused by “clipping.” Check your interface’s gain knobs. You want your meters to stay in the “green” or “yellow” zone (around -12dB to -6dB). Never let them hit the “red.”
What if my digital piano only has 5-pin MIDI ports?
This is where the Roland UM-ONE mk2 is essential. It converts those old 5-pin ports into a modern USB connection for your computer with professional-grade timing accuracy.
Is the Scarlett Solo 4th Gen enough for a Grand Piano?
It is excellent for a focused, “mono” sound or for digital piano users. However, for the full “stereo image” of a grand piano, the Scarlett 2i2 is generally preferred because it supports two microphones.
Do I need an external sound card for these models?
If you own the Roland FP-30X, no, it has one built-in. For the Arturia and Studiologic, you need a computer, but an interface is only necessary if you want to listen through professional studio monitors with zero latency.
Can I record MIDI and Audio at the same time?
Yes. Most modern DAWs allow you to record a MIDI track (the data) and an Audio track (the sound) simultaneously. This gives you a “safety” audio track and a MIDI track for later editing.
What is the best VST for a MIDI controller?
For realism, Pianoteq 8 (Physical Modeling) or Spectrasonics Keyscape (Sampling) are the industry standards for professional-sounding piano recordings.
Last updated March 31, 2026